How to delete recovery partition in Windows 7/8/10?
There are basically two kinds of recovery partitions in Windows systems:
– Windows recovery partitions
– and computer supplier’s recovery partitions.
Windows recovery partition allows you to boot into Windows recovery environment (WinRE) to restore your computer when problems happen, while the recovery partitions created by manufacturers allow you to press a specific key (for example: F9 for HP or F12 for Dell) to recover your computer to the factory default settings.
If you see a few gigabytes recovery partition in Disk Management, it is definitely included by computer manufacturers such as Dell, HP or Lenovo. This recovery partition contains an image of everything pre-installed along with operating system. On some computers, it is labeled as OEM reserved partition. You may also see a recovery partition with several gigabytes space and an OEM partition that is less than 100 MB.
You may not know that but you are not allowed to delete recovery partition in Windows Disk Management but you can use DISKPART command to delete partitions from command prompt (of course, you are doing this on your own risk):
1. Run Command Prompt (CMD) as administrator.
2. In CMD run: diskpart
3. Next display all your disks with: list disk
4. Then select disk with Recovery Partition (for example): select disk 2
5. Display all partitions on your disk: list partition
6. Select the correct partiotion (those with label Recovery, for example): select partition 3
7. delete partition override
Windows Server 2012R2: clean up WinSxS using DISM.
Over time, as your Windows Server runs longer and longer, more and more disk space (on system partiotion) is eaten. Simply gone. Investigating the disk usage leaves you clueless: there are no large log files, crash dumps, or there is no software to be removed. Where did that space go?
The answer as always is simple: Windows Updates, Service Pack, and hotfix installations.
On Windows Server, the Windows component store (C:\Windows\WinSxS) contains all the files that are required for a Windows installation. And, any updates to those files are also held within the component store as the updates are installed (source: KB2795190 and do read Manage the Component Store). The WinSxS folder will become larger and larger…
Deployment Image Servicing and Management (DISM) is a command-line tool that allows you to install, uninstall, configure, and update Windows features, packages, drivers, and international settings. The /Cleanup-Image parameter of dism.exe provides advanced users more options to further reduce the size of the WinSxS folder.
Here are the parameters most useful for clean up WinSxS folder:
1. Use the /AnalyzeComponentStore to analyze the size of the Component Store (WinSxS folder) in Windows. The AnalyzeComponentStore option is available in Windows 8.1 and Windows Server 2012R2.
dism.exe /Online /Cleanup-Image /AnalyzeComponentStore
2. Dism.exe removes superseded and unused system files from a system with the /StartComponentCleanup parameter (parameter is supported on Windows 8 and Windows Server 2012).
dism.exe /Online /Cleanup-Image /StartComponentCleanup
3. Using the /ResetBase switch with the /StartComponentCleanup parameter of dism.exe, all superseded versions of every component in the component store is removed (parameter is supported on Windows 8.1 and Windows Server 2012R2).
dism.exe /Online /Cleanup-Image /StartComponentCleanup /ResetBase
All existing service packs and updates cannot be uninstalled after this command is completed. This will not block the uninstallation of future service packs or updates.
4.The /SPSuperseded parameter removes any backup components needed for de-installation of a service pack (parameter is supported on Windows 7, Windows Server 2008R2 SP 1, Windows Server 2012, Windows Server 2012R2). The service pack cannot be uninstalled after this command is completed.
dism.exe /Online /Cleanup-Image /SPSuperseded
After cleaning up the disk, a server reboot is required – the actual cleanup of the WinSxS directory occurs during the next reboot.
Windows Server 2012R2: missing Power and Search Button on Start screen.
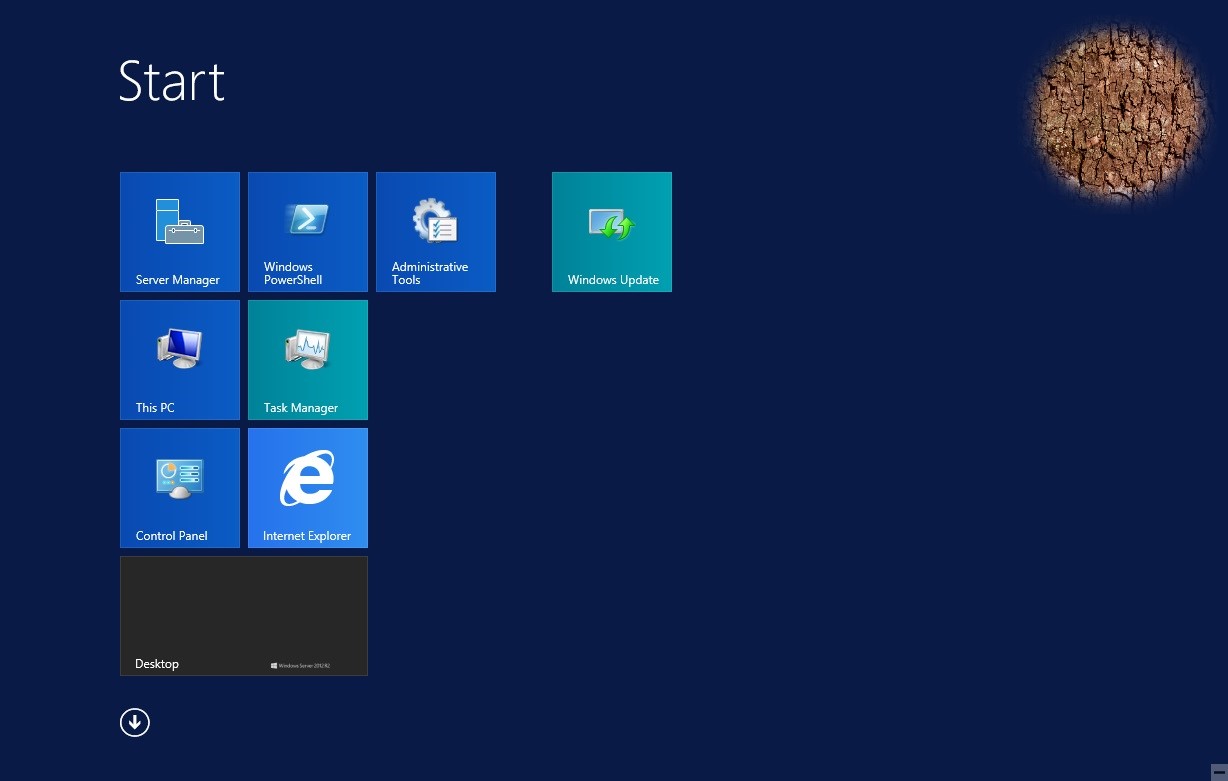
Recently, after installing a Windows Server 2012R2, I noticed the Start screen was missing the Power and Search buttons. All of my previous Windows Server 2012R2 installations had the Power and Search button on the start screen, I used the same ISO to install, and Windows was up to date. After researching, this issue can affect Windows Server 2012R2 as well as Windows 8.1. Here is a screenshot of my Start screen missing both the Power and Search buttons:
The solution is simple: KB2919355 needs to be installed. However, you need to make sure you install the following updates in this order:
1. Prerequisite: KB2919442
2. Install KB2919355 that has multiple downloads in it, which can be directly downloaded from the Microsoft Download Center:
– Windows 8.1 x86
– Windows 8.1 x64
– Server 2012 R2 x64
Important note: once downloaded, these updates need to be installed in the following order:
– clearcompressionflag.exe
– KB2919355 (reboot after installation, if fixed you can skip the rest)
– KB2932046
– KB2959977
– KB2937592
– KB2938439
– KB2934018
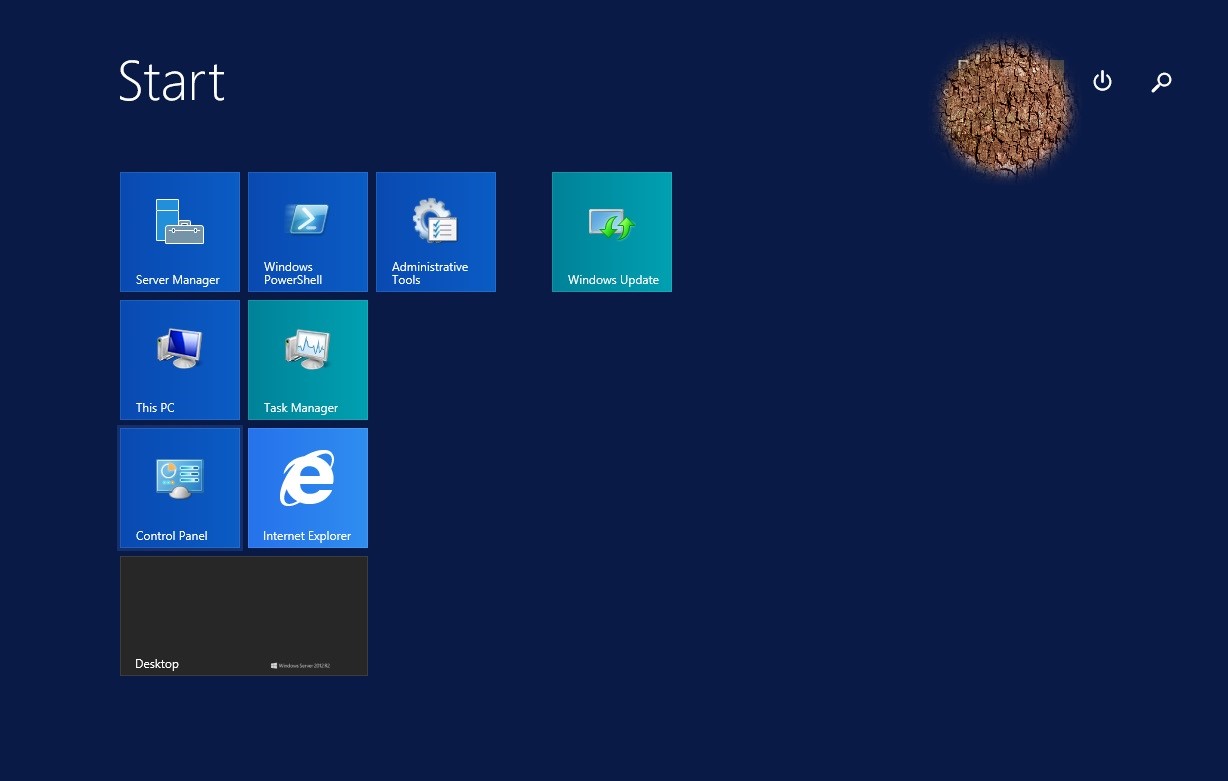
Once KB2919355 is installed and you reboot, you should now see the Power and Search buttons on the Start screen as displayed below:
And one more final note: once KB2919355 is installed, run Windows Updates and you’ll probably need to install a few hundred updates again.
How to install Adobe Flash Player for Firefox 64-bit on Oracle Linux.
First, get Flash Player for Linux 64bit: http://get.adobe.com/flashplayer/
I’ve downloaded both, the
– yum for linux (to easy get updates with yum in future)
– *.tar.gz version
Identify as root user and install yum version download with package installer or by command line as user root:
# yum install adobe-release-x86_64-1.0-1.noarch.rpm
Now we have to move the ‘libflashplayer.so’ into the mozilla plugin directory, open a terminal window, become root user:
# su -
Unzip the *.tar.gz file
# gunzip *.tar.gz
The *.tar file remains.
# tar -xf *.tar
This should extract the ‘libflashplayer.so’ file we need to move to the mozilla plugins directory. Verify the mozilla plugin directory exists: /usr/lib64/mozilla/plugins (if the plugins directory does not exist, create it).
Close your firefox, if it is still running.
Copy the ‘libflashplayer.so’ to the mozilla plugins directory:
cp libflashplayer.so /usr/lib64/mozilla/plugins
Open Firefox again and test your Flash Player configuration:
http://www.adobe.com/uk/software/flash/about/
That’s should be all.
Server FAILED_NOT_RESTARTABLE state in Oracle WebLogic Server 11g.
Today when I have go through my weblogic console I saw my one managed server in FAILED_NOT_RESTARTABLE state.
In my case after checking logs I find the following error message “weblogic.management.ManagementException: Unable to obtain lock on/u01/oid_domain/servers/wls_ods1/tmp/wls_ods1.lok. Server may already be running at weblogic.management. internal.ServerLocks. getServerLock (ServerLocks.java:159)”.
This could be because of two reasons
– WebLogic Server which you are trying to start is already running
– WebLogic Server which you are trying to start did not stop cleanly
Normally when weblogic server starts, it creates two lock files:
– $DOMAIN_HOME/servers//tmp/.lok
– $DOMAIN_HOME/servers//data/ldap/ldapfiles/EmbeddedLDAP.lok
When WebLogic server stops, it removes these two files. If you not stop server properly these lock files remains on that location and creating a problem when you attempt to start a server again and after more than one attempt your server goes in FAILED_NOT_RESTARTABLE state.
If you’ve got this issue, first identify if server is running on port configured for WebLogic Server by using netstat:
for LINUX
netstat -an | grep <WebLogic_Server_Port>
for Windows
netstat -aon | findstr <WebLogic_Server_Port>
If server is running then you should see output like this:
tcp 0 0 ::ffff:<IP>:<weblogic_port> :::* LISTEN
Note that there could be other process using this port (and that was my issue).
How to identify which port is configured for weblogic server?
To identify port configured for weblogic server open weblogic configuration file $DOMAIN_HOME/config/config.xml and search for listen-port, you should see entry like this:
<listen-port>7006</listen-port>
If server is not running then you can safely remove these lok files under WebLogic server. And if server is running then trying to stop it from console, backend or by killing the process id of the particular server then remove the .lok files.
Important thing to know – if this is weblogic managed server (not Admin Server) then you can safely remove entire managed server directory (including sub directories) $DOMAIN_HOME/servers/ or rename it as a backup. When you start managed server again, Admin Server will create these directories automatically.
ORA-00604 and ORA-29516 while dropping user accounts.
Lately, I was trying to drop a user account in one of my database. During this operation I came across the following errors:
ORA-00604: error occurred at recursive SQL level 1 and ORA-29516: Aurora assertion failure: Assertion failure.
It was obvious that the the real problem was the second error: ORA-29516. I quickly figured out that the JAVA component was corrupted – you can check this by executing java related packages:
select dbms_java.longname('TEST') from dual;
and then you’ve got the following error:
ERROR at line 1:
ORA-29516: Aurora assertion failure: Assertion failure at eox.c:359
Uncaught exception Root of all Java exceptions: java.lang.UnsatisfiedLinkError
sun.net.PortConfig.getLower0
ORA-06512: at “SYS.DBMS_JAVA”, line 139
The solution is relatively simple, just follow below steps:
execute sys.dbms_registry.loaded('JAVAVM');
execute sys.dbms_registry.valid('JAVAVM');
alter system set "_system_trig_enabled"=false scope=memory;
alter system set java_jit_enabled=false;
create or replace java system
/
and now you can check :
select dbms_java.longname(‘TEST’) from dual;

DBMS_JAVA.LONGNAME(‘TEST’)
--------------------------
TEST
That’s all.
ORA-12638: Credential retrieval failed.
If the Oracle client was installed using the domain administrator account instead of the local administrator, the following message could be displayed when trying to connect:
ORA-12638: Credential retrieval failed
From the wording of the error message one could think that this error means that he is using the wrong password but this is not the case. To solve this:
1. Go to ORACLE_HOME/network/admin and open sqlnet.ora file.
2. Search for SQLNET.AUTHENTICATION_SERVICES=(NTS) and change it to SQLNET.AUTHENTICATION_SERVICES=(NONE)
3. Save the file and try to connect, this should work…
Error “WindowsUpdate_80244019” or “WindowsUpdate_dt000” during update your Windows.
The problem in majority of the cases is related to the wrong DNS loading. The problem itself very often happens when you are behind several routers (like one from internet connection vendor and one your WiFi router) and until you don’t flush your current DNS configuration you can try anything but you won’t be successful.
What’s really funny that’s so easy – just run the command prompt with admin rights, then run the following command:
ipconfig /flushdns
make a coffee and get back to the WU heaven 🙂
All other applications are able to deal with that – WU not. From my point of view this is a bug and I am just surprised it’s nowhere documented.
You could also register the DNS in command prompt with:
ipconfig /registerdns
and check your current DNS settings with:
ipconfig /displaydns
Hope this helps!
Solving ORA-01031: insufficient privileges while connecting as sqlplus / as sysdba.
Many times we can see an issue like this:

This is a very common and frequent error that can occur after the new oracle software install or due to some permissions changes at OS level. I will discuss the approach to solve ORA-1031 error on both Windows and Linux environment but first a little theory.
An administrative account is a user that is granted SYSOPER or SYSDBA privileges. Oracle DBAs and operators typically use administrative accounts to manage the database and database instance. SYSDBA and SYSOPER allow access to a database instance even if it is not running. Control of these privileges is managed outside of the database via password files and special operating system groups (dba on Unix/Linux and ORA_DBA on Windows). External password files are created with the orapwd utility.
If an administrative users belongs to the ‘dba’ group on Linux or the ‘ORA_DBA’ group on Windows, he/she can connect like this:
sqlplus / as sysdba
No password is required. This is equivalent to the unsupported “connect internal” method.
A password is required for “non-secure” administrative access. These passwords are stored in password files. Remote connections via Net8 are classified as non-secure. Look at this example:
sqlplus sys/password as sysdba
The Oracle password file ($ORACLE_HOME/dbs/orapw$ORACLE_SID or $ORACLE_HOME/database/orapw$ORACLE_SID) stores passwords for users with administrative privileges. One needs to create a password files before remote administrators will be allowed to connect.
Follow this procedure to create a new password file:
– Log in as the Oracle software owner
– Run command: orapwd file=$ORACLE_HOME/dbs/orapw$ORACLE_SID password=mypasswd
– Shutdown the database (SHUTDOWN IMMEDIATE)
– Edit the INIT.ORA file and ensure REMOTE_LOGIN_PASSWORDFILE=exclusive is set
– Startup the database (STARTUP)
Keep in mind that the orapwd utility presents a security risk in that it receives a password from the command line. This password is visible in the process table (at least as long as orapwd is running) and in the shell’s history file of many systems.
Last but not least, avoid at all cost the OPS$ accounts and setting the REMOTE_OS_AUTHENT initialization parameter (deprecated in Oracle 11g) which could be a security risk in a client/server environment.
Now, let’s go back to the ORA-01031 error – how to solve it in Windows environment?
First of all, be sure that your OS user belongs to the ORA_DBA group.

Then, set the SQLNET.AUTHENTICATION_SERVICES parameter to NTS in the sqlnet.ora file (located in the $ORACLE_HOME/network/admin):
SQLNET.AUTHENTICATION_SERVICES=(NTS)
which allows Windows users to be authenticated using Windows NT native security.
With your user account added to the ORA_DBA group and the SQLNET.AUTHENTICATION_SERVICES parameter being set to NTS, you should have sufficient privileges and be able to connect as SYSDBA without a password.
How to solve the ORA-01031 error in UNIX/Linux environment?
1. Check that $ORACLE_SID and $ORACLE_HOME are set correctly as:
echo $ORACLE_SID
echo $ORACLE_HOME
Find the values returned by above commands and match these values under /etc/oratab file, these have to be listed there.

The values above are matching with /etc/oratab entries.
If the $ORACLE_SID and $ORACLE_HOME are not set properly then set it as:
export ORACLE_SID=orcl11gr2
export ORACLE_HOME=/u01/app/oracle/product/1120
and try to connect as “/ as sysdba” – it should work now.
If these are correct but still the error is coming then move to step 2.
2. Ensure you are invoking sqlplus from correct $ORACLE_HOME by checking the $PATH environment variable:
echo $PATH
If this is correct but still the error is coming then move to step 3.
3. Set the SQLNET.AUTHENTICATION_SERVICES parameter to ALL in the sqlnet.ora file (located in the $ORACLE_HOME/network/admin):
SQLNET.AUTHENTICATION_SERVICES=(ALL)
If this is correct but still the error is coming then move to step 4.
4. Ensure $TWO_TASK is not set.
echo $TWO_TASK
If it return any lines, then unset the environment variable as:
unset TWO_TASK
If this is correct but still the error is coming then move to step 5.
5. Check the permissions on the Oracle executable file.

It should show the permissions as on the above screen – if its not the same then issue the following command to set the correct permissions:
chmod 6751 oracle
If these are correct but still the error is coming then move to step 6.
6. Make sure that dba group at OS level only exists once in /etc/group file and that the users belonging to the dba group are properly comma separated. Check that the oracle user uid and gid are the same in /etc/group and /etc/passwd.
If these are correct but still the error is coming then move to step 7.
7. Check for the dba group at OS level. We need to make sure that OS user issuing “connect / as sysdba” belongs to dba group at OS level.
There is one file we need to check for this: $ORACLE_HOME/rdbms/lib/config.s or $ORACLE_HOME/rdbms/lib/config.c (file name vary depending on OS). The value for SS_DBA_GRP in these file is typically set to “dba” :

Let’s check it as oracle user:
[oracle@orclprod ~]$ id
uid=54321(oracle) gid=54321(oinstall) groups=54321(oinstall),54322(orcldba)
Look for the groups value here – 54322(orcldba), the value is orcldba so we need to modify the config.c or config.s so that it should look like:
#define SS_DBA_GRP "orcldba"
After making changes to config file make sure that:
– no oracle processes are running
– login as oracle
– $LD_LIBRARY_PATH and $ORACLE_HOME are set properly
and relink oracle binaries with the following command:
$ORACLE_HOME/bin/relink all
If all previous settings are correct and still ORA-1031 is coming then the only option is to take strace output and check while opening which file the error is coming – for example:
strace -o /tmp/strace.txt sqlplus "/ as sysdba"
Automating Oracle database startup and shutdown on Linux.
If you are using Oracle Clusterware 10gR2 or above for RAC or just for a single instance using ASM, the Clusterware automatically starts and stops the Oracle database instances and listeners, so the following procedures are not necessary. Where the Clusterware is not being used, these methods allow you to automate the startup and shutdown of Oracle databases on Linux.
The following represents the Oracle recommended method for automating database startup and shutdown of Oracle 9i instances on Linux, but it works equally well for Oracle 10g, 11G and 12c also. It can be used on any RHEL-style distribution, including Oracle Linux, up to and including Oracle Linux 7.
The below example was created on Oracle Linux 7 and Oracle database 11gR2.
Once the instance is created, edit the /etc/oratab file setting the restart flag for each instance to ‘Y’.
orcl11gr2:/u01/app/oracle/product/1120:Y
Create a file called ‘/etc/init.d/dbora’ as the root user, containing the following code.
#!/bin/sh
# chkconfig: 345 99 10
# description: Oracle auto start-stop script.
#
# Set ORA_HOME to be equivalent to the $ORACLE_HOME
# from which you wish to execute dbstart and dbshut;
#
# Set ORA_OWNER to the user id of the owner of the
# Oracle database in ORA_HOME.

#ORA_HOME=/u01/app/oracle/product/10.2.0/db_1
#ORA_HOME=/u01/app/oracle/product/11.1.0/db_1
ORA_HOME=/u01/app/oracle/product/11.2.0/db_1
#ORA_HOME=/u01/app/oracle/product/12.1.0/db_1
ORA_OWNER=oracle
export ORACLE_UNQNAME=orcl11gr2

if [ ! -f $ORA_HOME/bin/dbstart ]
then
    echo "Oracle startup: cannot start"
    exit
fi

case "$1" in
    'start')
        # Start the Oracle databases:
        # The following command assumes that the oracle login
        # will not prompt the user for any values
        # Remove "&" if you don't want startup as a background process.
        #su $ORA_OWNER -c "$ORA_HOME/bin/lsnrctl start" &
        su $ORA_OWNER -c "$ORA_HOME/bin/dbstart $ORA_HOME" &
        touch /var/lock/subsys/dbora
        ;;
    'stop')
        # Stop the Oracle databases:
        # The following command assumes that the oracle login
        # will not prompt the user for any values
        su $ORA_OWNER -c "$ORA_HOME/bin/dbshut $ORA_HOME"
        #su $ORA_OWNER -c "$ORA_HOME/bin/lsnrctl stop"
        rm -f /var/lock/subsys/dbora
        ;;
esac
The lines to start and stop the listener are no longer needed under Oracle 10g Release 2 onward, as the dbstart command includes an automatic start of the listener. If you still need the commands to start and stop listener – just unhash them.
Use the chmod command to set the privileges to 750:
chmod 750 /etc/init.d/dbora
Associate the ‘dbora’ service with the appropriate run levels and set it to auto-start using the following command.
chkconfig --add dbora
The relevant instances should now startup/shutdown automatically at system startup/shutdown.
Now to start the database run the command as root user:
service dbora start
Similarly to stop the database run the command as root user:
service dbora stop
